We have the first of another new Katia Yarn in the shop .... the rest the range should be available later in September, Katia Cotton 100%. A 120 mts in a 50gram ball, absolutely perfect for those light airy summer creations.
Check out the colour card and pattern support by clicking the following link. Any patterns or colours can be ordered for you in advance.
Click here to view colour card and pattern support
Showing posts with label Crochet. Show all posts
Thursday, 4 September 2014
Wednesday, 13 March 2013
Free Crochet Pattern - Spring Bouquet Afghan
Spring Bouquet Afghan
From FreePatterns.com
Delicate motifs come together in this delightful blanket you'll love to wrap baby in. Size : 40" square including border.
Skill Level: Intermediate.
Designed by Josie Rabier
Monday, 18 February 2013
Free Enchanting Top Crochet Pattern
Tuesday, 29 January 2013
Free Crochet Pattern - Afghan
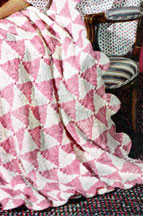
"Make this afghan and you will be smiling in spite of the weather outside. This project gives the crocheter lots of flexibility to use personal color choices to make it your own. Design by Nanette Seale"
To get the free pattern and find out about Crochet World Magazine click here ...
Monday, 28 January 2013
Free Crochet Pattern - 5 Petal Crochet Flower
Chi Wei from One Dog Woof has posted a wonderful free pattern for a crochet flower on her website.
In her own words "When I was making hats for my craft fair, I discovered that I tended toward boyish or at the very least, gender neutral hat colors and designs. ...... I'm not a (very) girlie girl, and you won't ever catch me with a hot pink hat. ..... I like having options available for those last minute mood-dependent decisions. I decided to make (and sell) crocheted flower pins that can be pinned to a hat (or not), so you can mix and match flower and hat colors.
I couldn't find a flower pattern that I loved, so I made up my own.
These little flowers are quick and easy to make, and can brighten up
any outfit. Or group them together for some springtime cheer! "
To read the full post and get the free pattern click here .....
In her own words "When I was making hats for my craft fair, I discovered that I tended toward boyish or at the very least, gender neutral hat colors and designs. ...... I'm not a (very) girlie girl, and you won't ever catch me with a hot pink hat. ..... I like having options available for those last minute mood-dependent decisions. I decided to make (and sell) crocheted flower pins that can be pinned to a hat (or not), so you can mix and match flower and hat colors.
I couldn't find a flower pattern that I loved, so I made up my own.
These little flowers are quick and easy to make, and can brighten up
any outfit. Or group them together for some springtime cheer! "To read the full post and get the free pattern click here .....
Wednesday, 23 January 2013
Crochet bikinis make a comeback
Crochet bikinis make a comeback? OK I saw this and thought someone was having a joke ... but apparently it is back to the 70's on the Gold Coast.
Swimming in them ???? hmmmmm I think that is another story.
CHLOE Dunlop is spearheading a group of Gold Coast Generation Y hippies who are reliving the seventies.The swimwear designer is part of a community who have brought back the golden era by shooting through vintage film cameras, riding retro single-fin surfboards, wearing pre-loved clothes and listening to their dad's Jimi Hendrix vinyls.
But a reincarnation of the Gold Coast in the '70s would not be complete without beach babes soaking up the sun in crochet bikinis.
Today, Ms Dunlop fills that nostalgic gap as she launches her new crochet swimwear line She Made Me. Read more ......
Apparently they sell for around $100 ... and NO! I will not be modelling one, any time soon. But if you want to revisit the 1970's you can check out the article above and buy one, or ...
You could make one!
Whatever you do have fun,
even if it is just a bit of nostalgia for grandma LOL!
HOW TO CROCHET A BIKINI TOP
|
|
Free CROCHET Pattern BEACH COVER-UP |
Or maybe this one from
|
Tuesday, 22 January 2013
Katia Linda 8 Ply 50 grams
| ||||||||||||
Colour 121 | ![]() |
![]() Colour 126 | ![]() |
![]() Colour 127 | ![]() |

Local Pickup is Free, from:
Crafty Frog
Shop 4, 107 Marconi Cres, Kambah, ACT
Phone: 02 6296 6240

Wool is posted in Australia Post Satchels
a 500 gram Satchel costs $7.20 (10 x 50 gram balls)
a 3 kg Satchel costs $12.50 (about 20 x 100 gram balls will fit)
Monday, 21 January 2013
Katia Gatsby
Katia Gatsby
|
||||||||
|
||||||||
88502 Black/Silver |
|
| |
|
Thursday, 17 January 2013
Free Crochet Pattern - Shell Stitch Baby Set Pattern
Published on Crochet Patterns (http://freevintagecrochet.com)
Pattern Book:
Baby Book Crocheted & Knitted
This is a beautiful free pattern from Purple Kitty Yarns, all rights belong to them and their subsidiary sites.
Materials Required:
AMERICAN THREAD COMPANY
"DAWN" ORLON HIGH BULK FINGERING YARN or
"DAWN" ORLON POMPADOUR
8 ounces Buttercup or color of your choice
Plastic Crochet Hook Size E OR ANY SIZE HOOK WHICH WILL RESULT IN STITCH GAUGE BELOW
1 yd. ½ inch Ribbon
6 yds. ¼ inch Ribbon
GAUGE: 1 sc in back loop of 4 sc, 4 dc in ch 1 = 1 inch
SACQUE
Chain (ch) 76 to measure about 12 inches, 1 double crochet (dc) in 4th stitch (st) from hook, * ch 1, skip 1 st of ch, 1 dc in each of the next 2 sts of ch, repeat from * across ch, ch 3, turn (ch 3 counts as 1 dc). 2nd ROW: 1 dc in next dc, * 1 dc in next ch 1, 1 dc in each of the next 2 dc, repeat from * across row ending with 1 dc in each of the last 2 dc, ch 3, turn. 3rd ROW: 1 dc in next dc, * ch 1, 1 dc in each of the next 2 dc, repeat from * across row, ch 1, turn. 4th ROW: 1 single crochet (sc) in each dc and 1 sc in each ch 1 (110 sc), ch 3, turn. 5th ROW: 1 dc in same sc, * 1 dc in next sc, 2 dc in next sc, repeat from * across row, ch 3, turn (164 dc). 6th ROW: Working in back loop of sts only 1 dc in each of the next 3 sts, * working in front loop of sts only 1 dc in each of the next 4 sts, working in back loop of sts 1 dc in each of the next 4 sts, repeat from * across row ending with a dc in turning ch, ch 3, turn. 7th ROW: Working in front loop of sts 1 dc in each of the next 3 sts, * working in back loop of sts 1 dc in each of the next 4 sts, working in front loop of sts 1 dc in each of the next 4 sts, repeat from * across row, ch 3, turn. 8th ROW: Repeat 6th row, ch 1, turn. 9th ROW: * Working in back loop of sts only 1 sc in each of the next 4 dc, ch 1, skip 1 dc, repeat from * across row ending with 1 sc in each of the last 4 dc, ch 1, turn. 10th ROW: * Working in back loop of sts only 1 sc in each of the next 4 sc, 4 dc in ch 1, repeat from * across row ending with 1 sc in each remaining sc, ch 1, turn. 11th ROW: * Working in back loop of sts only 1 sc in each of the next 4 sc, ch 1, repeat from * across row ending with 1 sc in each remaining sc (The last 2 rows form pattern). 12th ROW: Repeat 10th row. 13th ROW: Working in back loop of sts only 1 sc in each of the next 4 sc, * ch 1, 1 sc in each of the next 4 sc, repeat from * 4 times (Left Front), ch 3, skip next 6 shells, 1 sc in each of the next 4 sc (Sleeve opening), * ch 1, 1 sc in each of the next 4 sc, repeat from * 9 times (Back), ch 3, skip next 6 shells, 1 sc in each of the next 4 sc (Sleeve opening), continue in pattern across row for Right Front, ch 1, turn. 14th ROW: Work in pattern to ch 3 at underarm, skip 1 st of ch, 4 dc in next st, skip 1 st of ch, 1 sc in each of the next 4 sc, continue in pattern working other underarm in same manner. Work in pattern until Sacque measures 7 inches from underarm ending with a shell row, cut yarn.
SLEEVES: With right side toward you attach yarn in center shell at underarm, ch 1, 1 sc in same space, 1 sc in next st, 1 sc between rows, 1 sc in next st, 1 sc in next st, ch 1, continue in pattern around sleeve opening ending row to correspond, join, ch 1, turn. Work in pattern on 7 shells until sleeve measures 6 inches from underarm ending with an sc row, join, turn. NEXT ROW: Ch 3, 1 dc in next st, * ch 1, skip 1 st, 1 dc in each of the next 2 sts, repeat from * to end of row, ch 1, join, turn. NEXT ROW: Ch 1, working in back loop of sts only 1 sc in next st, * ch 3, sc in same space for picot, 1 sc in each of the next 4 sts, repeat from * to end of row, join, cut yarn. Work other sleeve to correspond. With right side toward you attach yarn at lower right front edge, work a row of sc around right front, neck and left front working 2 sc at corners of neck, 1 sc in each st around neck and 1 sc in each ch 1 space, cut yarn. With right side of work toward you attach yarn at neck edge and work picot edge same as sleeve edge ending both front corners in same manner. Trim with ribbon as illustrated.
BOOTIES
Ch 35 to measure about 6 inches, 1 sc in 2nd st from hook, 1 sc in each of the next 3 sts, * ch 1, skip 1 st of ch, 1 sc in each of the next 4 sts, repeat from * across ch, ch 1, turn. Work in pattern same as Sacque for 1½ inches ending with an sc row. NEXT ROW: Working in both loops of sts, ch 1, 1 sc in each sc, 1 sc in each ch 1, 1 sc in end st, ch 3, turn (35 sc). NEXT ROW: Dc in next sc, * ch 1, skip 1 sc, 1 dc in each of the next 2 sc, repeat from * across row for beading, ch 1, turn. NEXT ROW: 1 sc in each dc, 1 sc in each ch 1 (35 sc), cut yarn. NEXT ROW: (Instep) Attach yarn in 12th sc and working in back loops of sts only 1 sc in each of the next 11 sc, ch 1, turn. Continue working in sc and back loops of sts until instep measures 2 inches, cut yarn. NEXT ROW: With right side facing, join yarn in 1st sc, ch 1, sc in same space, working in both loops of sts, work 1 sc in next 11 sc, 7 sc on side of instep, 12 sc across instep, 7 sc on other side of instep, 1 sc in each remaining sc, join. NEXT ROW: 1 sc in each sc decreasing 3 sts evenly spaced around toe (to decrease: * insert hook in next st, pull loop through, repeat from * once, yarn over and work off all loops at one time), do not join this or following rounds. Place a marker at beginning of each round. NEXT 2 ROUNDS: 1 sc in each sc (46 sc). NEXT ROUND: Working in back loops of sts only 1 sc in each sc. NEXT 3 ROUNDS: Working through both loops of sts 1 sc in each sc. NEXT ROUND: 1 sc in each sc decreasing 3 sts evenly spaced at both toe and heel. NEXT ROUND: Same as last round but decreasing 2 sts at toe and heel, join in sc to even round, cut yarn. Sew sole and back seams. Attach yarn at back seam and work a picot edge same as sleeve edge. Trim with ribbon. Work another bootie in same manner.
CAP
Ch 67 to measure about 10½ inches, work 1st 2 rows same as Sacque. 3rd ROW: Dc in next dc, * ch 1, skip 1 dc, 1 dc in each of the next 2 dc, repeat from * across row, ch 1, turn. 4th ROW: 1 sc in each dc, 1 sc in each ch 1 space (64 sc), ch 1, turn. Work in pattern same as Sacque until cap measures 6 inches from beginning ending with an sc row, cut yarn. Sew back of cap. With right side toward you attach yarn at right lower edge and work 38 sc around lower edge of cap, ch 3, turn. NEXT ROW: 1 dc in next sc, * ch 1, skip 1 sc, 1 dc in each of the next 2 sc, repeat from * to end of row, ch 1, turn. NEXT ROW: Work a row of sc all around cap working 1 sc in each dc and in each ch 1, join in 1st sc, do not turn, ch 3, and work a picot edge all around cap same as sleeve edge ending to correspond. Trim with ribbon.
MITTENS
Ch 31 to measure about 5 inches, join, * ch 1, skip 1 st of ch, 1 sc in each of the next 4 sts of ch, repeat from * all around, join, ch 1, turn. Work in pattern joining and turning each row (same as sleeve) until mitten measures 2 inches ending with an sc row. Continue working in pattern decreasing 1 st in each sc section until 2 sts remain in each sc section ending with an sc row. Discontinue pattern. Working in both loops of sts work 1 row of sc, join, ch 1, turn. NEXT ROW: 1 sc in each sc decreasing 4 sts evenly spaced, cut yarn leaving an end, draw through sts and fasten tightly. Attach yarn at seam and work 30 sc around edge of mitten, join in 1st sc, do not turn. NEXT ROW: Ch 3, 1 dc in each sc, join. NEXT ROW: Ch 3, 1 dc in next dc, * ch 1, skip 1 dc, dc in next 2 dc, repeat from * all around for beading, ch 1, join. Work picot edge same as sleeve edge, cut yarn. Trim with ribbon. Work another mitten in same manner.
AMERICAN THREAD COMPANY
"DAWN" ORLON HIGH BULK FINGERING YARN or
"DAWN" ORLON POMPADOUR
8 ounces Buttercup or color of your choice
Plastic Crochet Hook Size E OR ANY SIZE HOOK WHICH WILL RESULT IN STITCH GAUGE BELOW
1 yd. ½ inch Ribbon
6 yds. ¼ inch Ribbon
GAUGE: 1 sc in back loop of 4 sc, 4 dc in ch 1 = 1 inch
SACQUE
Chain (ch) 76 to measure about 12 inches, 1 double crochet (dc) in 4th stitch (st) from hook, * ch 1, skip 1 st of ch, 1 dc in each of the next 2 sts of ch, repeat from * across ch, ch 3, turn (ch 3 counts as 1 dc). 2nd ROW: 1 dc in next dc, * 1 dc in next ch 1, 1 dc in each of the next 2 dc, repeat from * across row ending with 1 dc in each of the last 2 dc, ch 3, turn. 3rd ROW: 1 dc in next dc, * ch 1, 1 dc in each of the next 2 dc, repeat from * across row, ch 1, turn. 4th ROW: 1 single crochet (sc) in each dc and 1 sc in each ch 1 (110 sc), ch 3, turn. 5th ROW: 1 dc in same sc, * 1 dc in next sc, 2 dc in next sc, repeat from * across row, ch 3, turn (164 dc). 6th ROW: Working in back loop of sts only 1 dc in each of the next 3 sts, * working in front loop of sts only 1 dc in each of the next 4 sts, working in back loop of sts 1 dc in each of the next 4 sts, repeat from * across row ending with a dc in turning ch, ch 3, turn. 7th ROW: Working in front loop of sts 1 dc in each of the next 3 sts, * working in back loop of sts 1 dc in each of the next 4 sts, working in front loop of sts 1 dc in each of the next 4 sts, repeat from * across row, ch 3, turn. 8th ROW: Repeat 6th row, ch 1, turn. 9th ROW: * Working in back loop of sts only 1 sc in each of the next 4 dc, ch 1, skip 1 dc, repeat from * across row ending with 1 sc in each of the last 4 dc, ch 1, turn. 10th ROW: * Working in back loop of sts only 1 sc in each of the next 4 sc, 4 dc in ch 1, repeat from * across row ending with 1 sc in each remaining sc, ch 1, turn. 11th ROW: * Working in back loop of sts only 1 sc in each of the next 4 sc, ch 1, repeat from * across row ending with 1 sc in each remaining sc (The last 2 rows form pattern). 12th ROW: Repeat 10th row. 13th ROW: Working in back loop of sts only 1 sc in each of the next 4 sc, * ch 1, 1 sc in each of the next 4 sc, repeat from * 4 times (Left Front), ch 3, skip next 6 shells, 1 sc in each of the next 4 sc (Sleeve opening), * ch 1, 1 sc in each of the next 4 sc, repeat from * 9 times (Back), ch 3, skip next 6 shells, 1 sc in each of the next 4 sc (Sleeve opening), continue in pattern across row for Right Front, ch 1, turn. 14th ROW: Work in pattern to ch 3 at underarm, skip 1 st of ch, 4 dc in next st, skip 1 st of ch, 1 sc in each of the next 4 sc, continue in pattern working other underarm in same manner. Work in pattern until Sacque measures 7 inches from underarm ending with a shell row, cut yarn.
SLEEVES: With right side toward you attach yarn in center shell at underarm, ch 1, 1 sc in same space, 1 sc in next st, 1 sc between rows, 1 sc in next st, 1 sc in next st, ch 1, continue in pattern around sleeve opening ending row to correspond, join, ch 1, turn. Work in pattern on 7 shells until sleeve measures 6 inches from underarm ending with an sc row, join, turn. NEXT ROW: Ch 3, 1 dc in next st, * ch 1, skip 1 st, 1 dc in each of the next 2 sts, repeat from * to end of row, ch 1, join, turn. NEXT ROW: Ch 1, working in back loop of sts only 1 sc in next st, * ch 3, sc in same space for picot, 1 sc in each of the next 4 sts, repeat from * to end of row, join, cut yarn. Work other sleeve to correspond. With right side toward you attach yarn at lower right front edge, work a row of sc around right front, neck and left front working 2 sc at corners of neck, 1 sc in each st around neck and 1 sc in each ch 1 space, cut yarn. With right side of work toward you attach yarn at neck edge and work picot edge same as sleeve edge ending both front corners in same manner. Trim with ribbon as illustrated.
BOOTIES
Ch 35 to measure about 6 inches, 1 sc in 2nd st from hook, 1 sc in each of the next 3 sts, * ch 1, skip 1 st of ch, 1 sc in each of the next 4 sts, repeat from * across ch, ch 1, turn. Work in pattern same as Sacque for 1½ inches ending with an sc row. NEXT ROW: Working in both loops of sts, ch 1, 1 sc in each sc, 1 sc in each ch 1, 1 sc in end st, ch 3, turn (35 sc). NEXT ROW: Dc in next sc, * ch 1, skip 1 sc, 1 dc in each of the next 2 sc, repeat from * across row for beading, ch 1, turn. NEXT ROW: 1 sc in each dc, 1 sc in each ch 1 (35 sc), cut yarn. NEXT ROW: (Instep) Attach yarn in 12th sc and working in back loops of sts only 1 sc in each of the next 11 sc, ch 1, turn. Continue working in sc and back loops of sts until instep measures 2 inches, cut yarn. NEXT ROW: With right side facing, join yarn in 1st sc, ch 1, sc in same space, working in both loops of sts, work 1 sc in next 11 sc, 7 sc on side of instep, 12 sc across instep, 7 sc on other side of instep, 1 sc in each remaining sc, join. NEXT ROW: 1 sc in each sc decreasing 3 sts evenly spaced around toe (to decrease: * insert hook in next st, pull loop through, repeat from * once, yarn over and work off all loops at one time), do not join this or following rounds. Place a marker at beginning of each round. NEXT 2 ROUNDS: 1 sc in each sc (46 sc). NEXT ROUND: Working in back loops of sts only 1 sc in each sc. NEXT 3 ROUNDS: Working through both loops of sts 1 sc in each sc. NEXT ROUND: 1 sc in each sc decreasing 3 sts evenly spaced at both toe and heel. NEXT ROUND: Same as last round but decreasing 2 sts at toe and heel, join in sc to even round, cut yarn. Sew sole and back seams. Attach yarn at back seam and work a picot edge same as sleeve edge. Trim with ribbon. Work another bootie in same manner.
CAP
Ch 67 to measure about 10½ inches, work 1st 2 rows same as Sacque. 3rd ROW: Dc in next dc, * ch 1, skip 1 dc, 1 dc in each of the next 2 dc, repeat from * across row, ch 1, turn. 4th ROW: 1 sc in each dc, 1 sc in each ch 1 space (64 sc), ch 1, turn. Work in pattern same as Sacque until cap measures 6 inches from beginning ending with an sc row, cut yarn. Sew back of cap. With right side toward you attach yarn at right lower edge and work 38 sc around lower edge of cap, ch 3, turn. NEXT ROW: 1 dc in next sc, * ch 1, skip 1 sc, 1 dc in each of the next 2 sc, repeat from * to end of row, ch 1, turn. NEXT ROW: Work a row of sc all around cap working 1 sc in each dc and in each ch 1, join in 1st sc, do not turn, ch 3, and work a picot edge all around cap same as sleeve edge ending to correspond. Trim with ribbon.
MITTENS
Ch 31 to measure about 5 inches, join, * ch 1, skip 1 st of ch, 1 sc in each of the next 4 sts of ch, repeat from * all around, join, ch 1, turn. Work in pattern joining and turning each row (same as sleeve) until mitten measures 2 inches ending with an sc row. Continue working in pattern decreasing 1 st in each sc section until 2 sts remain in each sc section ending with an sc row. Discontinue pattern. Working in both loops of sts work 1 row of sc, join, ch 1, turn. NEXT ROW: 1 sc in each sc decreasing 4 sts evenly spaced, cut yarn leaving an end, draw through sts and fasten tightly. Attach yarn at seam and work 30 sc around edge of mitten, join in 1st sc, do not turn. NEXT ROW: Ch 3, 1 dc in each sc, join. NEXT ROW: Ch 3, 1 dc in next dc, * ch 1, skip 1 dc, dc in next 2 dc, repeat from * all around for beading, ch 1, join. Work picot edge same as sleeve edge, cut yarn. Trim with ribbon. Work another mitten in same manner.
Tuesday, 8 January 2013
Free Crochet Patterns - Candy Crochet Baby Blankets
Nicola Trumbull, editor for AllFreeCrochetAfghanPatterns has posted 51 Food Inspired Crochet Afghan Patterns for free. Click on the link above to see all of them, but here is a sample:
Candy-ghan Baby's First Afghan
By: Michael Sellick, The Crochet Crowd
Candy-ghan Baby's First Afghan
This image courtesy of thecrochetcrowd.com
|
Have a baby on the way, or know someone that does? The Candy-ghan Baby's First Afghan is a quick and colorful afghan that will look great in any baby's room. Grab some yarn and get started today!
Crochet Hook: N/15 or 10 mm hook
Conversation Hearts Afghan
By: Donna Mason-Svara at Ravelry
Crochet Hook: H/8 or 5 mm hook
Yarn Weight:
(4) Medium Weight/Worsted Weight and Aran (16-20 stitches to 4 inches)
| This image courtesy of www.freevintagecrochet.com |
Candy Cane Afghan
By: Free Vintage Crochet
Brighten your home with this Candy Cane Afghan. The
festive colors and bold design of this free Christmas crochet pattern
are sure to have you humming Christmas carols as you crochet.Get ready early for Christmas 2013
Crochet Hook: F/5 or 3.75 mm hook
Yarn Weight:
(4) Medium Weight/Worsted Weight and Aran (16-20 stitches to 4 inches)
Subscribe to:
Posts (Atom)